树莓派安装Docker跑SpringCloud集群
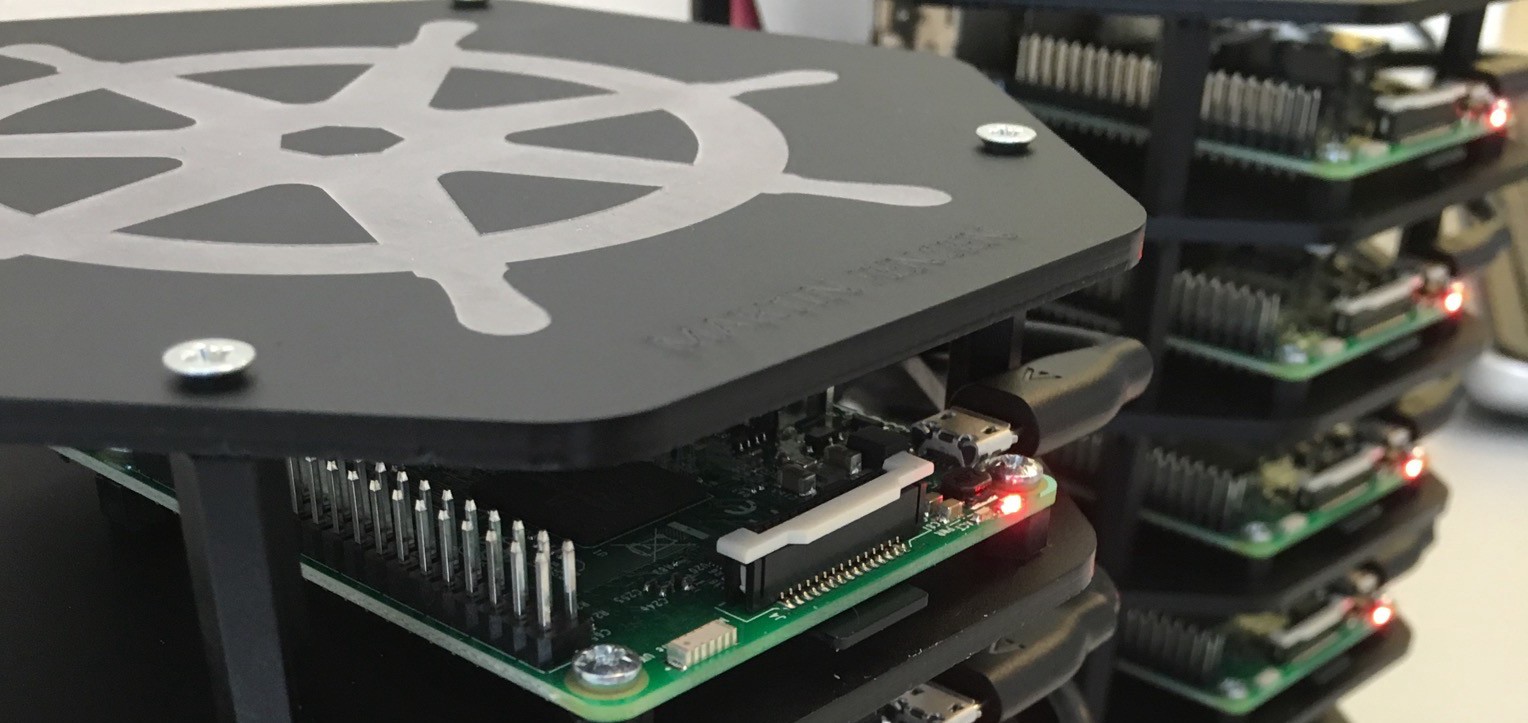
最近学了一下SpringCloud的东西,发现还是要有硬件才爽啊,不然总感觉少了点什么,然后我的吃灰派终于可以派上用场了。Google图片搜索一下“raspberrypi docker cluster”,你会发现许多大神搞的,比如这样的:
看这架势是在树莓派上跑了K8S了……于是我也尝试一番,嘿嘿。虽然踩了不少坑,所幸还是初步成功了。
References:
- https://www.raspberrypi.org/downloads/raspbian/ 树莓派官方镜像下载地址
- https://www.raspberrypi.org/documentation/linux/usage/users.md
- https://blog.csdn.net/farYang/article/details/50779767
- https://raspberrypi.stackexchange.com/questions/48056/how-to-login-as-root-remotely
- https://www.ionos.com/digitalguide/server/configuration/provide-raspberry-pi-with-a-static-ip-address/
- https://www.raspberrypi.org/forums/viewtopic.php?t=245073
- https://downloads.raspberrypi.org/raspbian/images/ 树莓派历史镜像full版本
- http://downloads.raspberrypi.org/raspbian_lite/images/ 树莓派历史镜像lite版本
- https://yeasy.gitbooks.io/docker_practice/install/raspberry-pi.html 一个很好的docker安装教程
- https://segmentfault.com/a/1190000016592187
- https://docs.docker.com/compose/install/ docker compose官方安装教程
- https://www.chenyudong.com/archives/docker-custom-hosts-network-via-dns.html
- https://www.viayc.com/2019/03/21/Docker%E6%8C%82%E8%BD%BD%E7%9B%AE%E5%BD%95Permission%20denied%E6%8A%A5%E9%94%99%E9%97%AE%E9%A2%98/ 如果使用centos建议关闭selinux,不然挂载目录会出现“Permission denied”
- https://stackoverflow.com/questions/30349811/register-to-eureka-from-docker-with-a-custom-ip
- https://hub.docker.com/r/dpsmyth/raspberrypi3-alpine-java
- https://hub.docker.com/u/arm32v7 树莓派上的官方镜像应该都是从arm32v7这个分支上拉的
- http://www.rpiblog.com/2014/03/installing-oracle-jdk-8-on-raspberry-pi.html
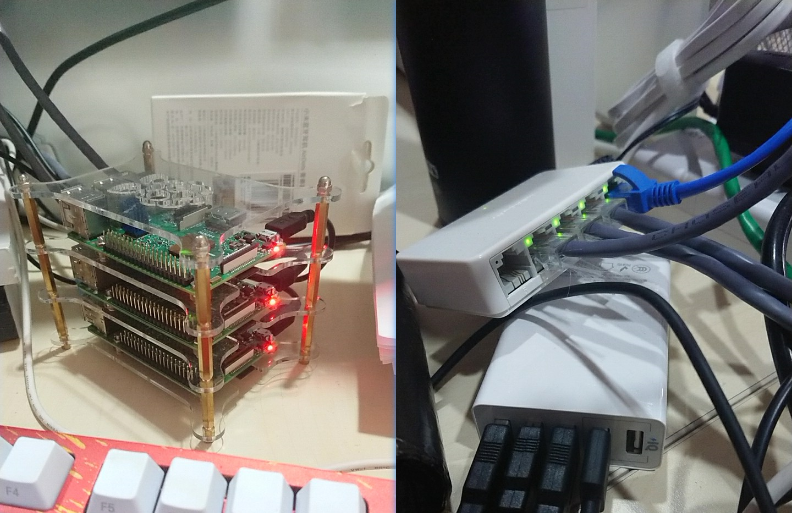
先看下硬件图:
我用的树莓派型号都是3B,目前咸鱼捡二手便宜点的裸板160能收到。
先来说一些大坑吧,想尝试的小伙伴要注意了。
- 内存卡最好是16GB以上的,我手里有块8GB的卡,原本以为够用了,但是系统虽然做好了,配置文件经常会莫名其妙的变成乱码,比如网络配置和密码配置等等,然后就是SSH连不上,密码错误这些。不知道是卡的问题还是容量的问题。所以可以的话,直接16GB+起步吧,反正现在TF卡也不贵。
- 系统选择树莓派官方的Raspbian就好,不要桌面就Lite版本,要桌面就full版本。不要尝试CentOS,我已经趟过浑水了。各种软件版本都是上古版本的不说,还少这个少那个包,与其费劲一个个编译,还不如直接换系统来的快,而且文档还多。至于其他什么Ubuntu或者Kali之类,谁用谁去踩坑,哈哈。
- 安装Docker compose的时候如果用pip安,要先卸载系统自带的pip,因为自带的pip也是上古版本,而且直接update升级是没用的,必须删掉重新装。
那就一步一步来吧,正好趁着我把centos都换掉的时候记录下。
TF卡做好系统后在根目录下新建一个空文件,文件名为“SSH”,没有后缀。因为树莓派容易被黑客攻击做肉鸡,所以树莓派官方现在默认禁用了SSH。如果需要开机就连接无线网络也是改配置,搜一下文章就行,我这里有网线,就不搞了。
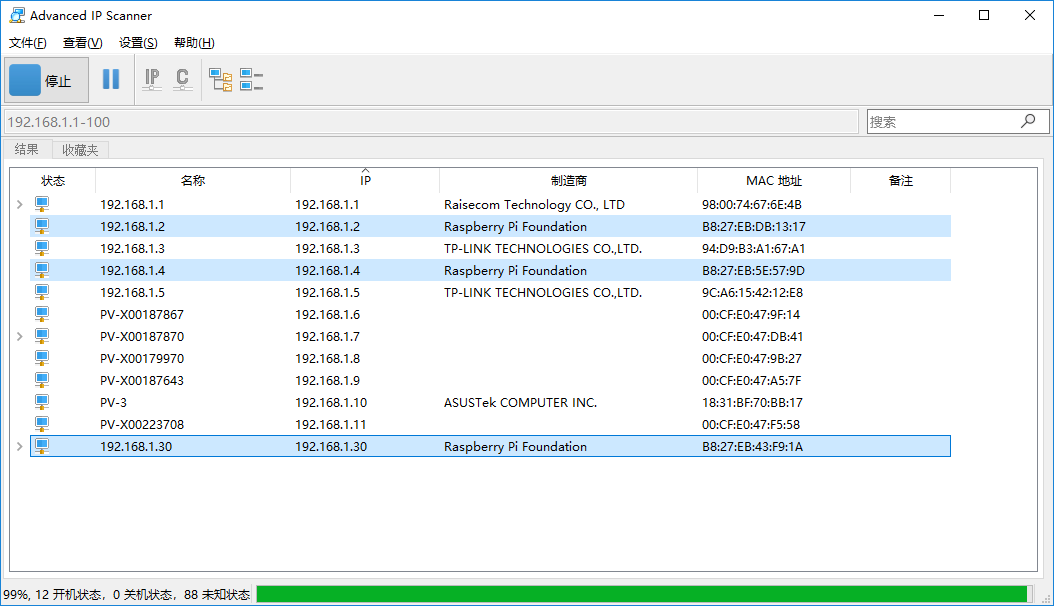
然后就是SSH上树莓派了,先找IP,可以上路由器看,由于路由器上设备太多,我懒得找了,直接用“Advanced IP Scanner”扫一下:
可以看到我的三台树莓派的IP已经找到了。默认的用户名是pi,密码是raspberry。
由于root默认被禁用,那首先就是启用root:
# 设置root用户的密码
pi@raspberrypi:~ $ sudo passwd root
New password:
Retype new password:
passwd: password updated successfully
# 解锁root用户
pi@raspberrypi:~ $ sudo passwd --unlock root
passwd: password expiry information changed.
pi@raspberrypi:~ $ su root
Password:
root@raspberrypi:/home/pi# cd
root@raspberrypi:~# pwd
/root
root@raspberrypi:~# df -h
Filesystem      Size  Used Avail Use% Mounted on
/dev/root        15G  1.2G   13G   9% /
devtmpfs        459M     0  459M   0% /dev
tmpfs           464M     0  464M   0% /dev/shm
tmpfs           464M  6.2M  457M   2% /run
tmpfs           5.0M  4.0K  5.0M   1% /run/lock
tmpfs           464M     0  464M   0% /sys/fs/cgroup
/dev/mmcblk0p1  253M   40M  213M  16% /boot
tmpfs            93M     0   93M   0% /run/user/1000
已经是root用户了,而且空间也是对的,之前用centos默认没有使用全部空间,还要手动执行命令才能扩充全部空间。
再设置允许root用户通过SSH登陆,因为默认是禁止root用户通过SSH密码登陆的,说是这样不安全,建议通过SSH密钥登陆。但是太麻烦了,我才不管呢。修改步骤如下:
- 编辑文件: sudo nano /etc/ssh/sshd_config
- 找到这一行: PermitRootLogin prohibit-password
- 修改为: PermitRootLogin yes
- 保存退出,等会重启就好了
然后就是设置静态IP了,不然每次重连都要找IP,挺麻烦的。步骤如下:
- 编辑文件: sudo nano /etc/dhcpcd.conf
- 找到这一行: # Example static IP configuration:
- 照着示例填写自己的,比如我的是
interface eth0
static ip_address=192.168.1.31/24
static routers=192.168.1.1
static domain_name_servers=192.168.1.1 8.8.8.8 fd51:42f8:caae:d92e::1- 保存退出,等会重启就好了
这样硬件基本就没问题了,下面就是软件的更新和安装。
先更新一下:
$ sudo apt-get update
Get:1 http://raspbian.raspberrypi.org/raspbian buster InRelease [15.0 kB]
Get:2 http://archive.raspberrypi.org/debian buster InRelease [25.1 kB]
Get:3 http://archive.raspberrypi.org/debian buster/main armhf Packages [205 kB]
Reading package lists... Done
E: Repository 'http://raspbian.raspberrypi.org/raspbian buster InRelease' changed its 'Suite' value from 'testing' to 'stable'
N: This must be accepted explicitly before updates for this repository can be applied. See apt-secure(8) manpage for details.
嗯?这还能报错,看起来是库的状态从testing变成了stable,需要我们决定是否接受改变。难道我特么还能拒绝?
$ sudo apt update --allow-releaseinfo-change然后就可以使用apt update和apt upgrade更新了。注意:apt-get命令和apt命令是两个东西,简单说就是apt是apt-get等命令的高级封装,详细自行查阅。
更新的好慢,十几KB...等待ing...好经历了一个多小时,终于更完了,继续
好吧,docker又特么安装失败了,因为buster版本太新了,docker的库可能还没更新,以后再追最新版本我就是傻逼。现在滚回stretch版本。
装完stretch版本后更新,发现速度还是慢,找了下,可以配置国内的源,比如清华大学的:https://mirror.tuna.tsinghua.edu.cn/help/raspbian/
换了之后嗖嗖的爽。
$ apt update一行搞定
安装docker
网上有很多用仓库安装的文章,但是我翻了官方文档,说是不支持这么操作,还是需要脚本安装。
官方安装方式:https://docs.docker.com/install/linux/docker-ce/debian/#install-using-the-convenience-script
这里执行脚本时为了更快,使用了阿里镜像。如果不是以root使用docker,需要一点额外操作,自己看文档去。
root@raspberrypi:~# curl -fsSL get.docker.com -o get-docker.sh
root@raspberrypi:~# sh get-docker.sh --mirror Aliyun
# Executing docker install script, commit: 2f4ae48
+ sh -c apt-get update -qq >/dev/null
+ sh -c apt-get install -y -qq apt-transport-https ca-certificates curl >/dev/null
+ sh -c curl -fsSL "https://mirrors.aliyun.com/docker-ce/linux/raspbian/gpg" | apt-key add -qq - >/dev/null
Warning: apt-key output should not be parsed (stdout is not a terminal)
+ sh -c echo "deb [arch=armhf] https://mirrors.aliyun.com/docker-ce/linux/raspbian stretch stable" > /etc/apt/sources.list.d/docker.list
+ sh -c apt-get update -qq >/dev/null
+ [ -n  ]
+ sh -c apt-get install -y -qq --no-install-recommends docker-ce >/dev/null
+ sh -c docker version
Client:
 Version:           18.09.0
 API version:       1.39
 Go version:        go1.10.4
 Git commit:        4d60db4
 Built:             Wed Nov  7 00:57:21 2018
 OS/Arch:           linux/arm
 Experimental:      false

Server: Docker Engine - Community
 Engine:
  Version:          18.09.0
  API version:      1.39 (minimum version 1.12)
  Go version:       go1.10.4
  Git commit:       4d60db4
  Built:            Wed Nov  7 00:17:57 2018
  OS/Arch:          linux/arm
  Experimental:     false
If you would like to use Docker as a non-root user, you should now consider
adding your user to the "docker" group with something like:

  sudo usermod -aG docker your-user

Remember that you will have to log out and back in for this to take effect!

WARNING: Adding a user to the "docker" group will grant the ability to run
         containers which can be used to obtain root privileges on the
         docker host.
         Refer to https://docs.docker.com/engine/security/security/#docker-daemon-attack-surface
         for more information.
root@raspberrypi:~#
然后是设置开机启动:
$ systemctl enable docker
$ systemctl start docker
运行hello world:
root@raspberrypi:~# docker run arm32v7/hello-world
Unable to find image 'arm32v7/hello-world:latest' locally
latest: Pulling from arm32v7/hello-world
c1eda109e4da: Pull complete
Digest: sha256:07e995a680212a0a8a01e181b3fff128d44b8fe0c11426b638ec3cde7273f0a3
Status: Downloaded newer image for arm32v7/hello-world:latest

Hello from Docker!
This message shows that your installation appears to be working correctly.

To generate this message, Docker took the following steps:
 1. The Docker client contacted the Docker daemon.
 2. The Docker daemon pulled the "hello-world" image from the Docker Hub.
    (arm32v7)
 3. The Docker daemon created a new container from that image which runs the
    executable that produces the output you are currently reading.
 4. The Docker daemon streamed that output to the Docker client, which sent it
    to your terminal.

To try something more ambitious, you can run an Ubuntu container with:
 $ docker run -it ubuntu bash

Share images, automate workflows, and more with a free Docker ID:
 https://hub.docker.com/

For more examples and ideas, visit:
 https://docs.docker.com/get-started/

root@raspberrypi:~#
至此Docker就安装好了,再安装docker compose。
先看有没有pip或pip3,有就直接卸了。然后安装:
$ apt-get remove python-pip python3-pip
$ wget https://bootstrap.pypa.io/get-pip.py
$ python get-pip.py
$ python3 get-pip.py
然后安装一些依赖库
apt install python-dev python3-dev libevent-dev python-scipy libssl-dev libffi-dev
apt install apt-transport-https ca-certificates curl gnupg2 software-properties-common
pip install cryptography
查看pip版本:
root@raspberrypi:~# pip3 --version
pip 19.1.1 from /usr/local/lib/python3.5/dist-packages/pip (python 3.5)
root@raspberrypi:~#
安装docker compose
这里通过pip的方式安装,所以先安装pip
$ pip3 install docker-compose如果你报了什么
TypeError: unsupported operand type(s) for -=: 'Retry' and 'int'这样的错误,多半是用了上古时代的pip,参考上述方式卸载重装,然后重启一下。如果是下面这样的错
pip._vendor.urllib3.exceptions.ReadTimeoutError: HTTPSConnectionPool(host='www.piwheels.org', port=443): Read timed out.是由于网络连接超时,重新执行命令就好,或者用国内镜像下载。
安装好了查看版本:
root@raspberrypi:~# docker-compose --version
docker-compose version 1.24.1, build 4667896
root@raspberrypi:~#
然后就要开始折腾Spring Cloud了。
这里就简单贴一下配置吧:
# application.yml

#cloud config
eureka:
  instance:
    hostname: raspberrypi30
    prefer-ip-address: false
    # Necessary for Docker otherwise you will get 172.17.0.x ip
    ip-address: "${HOST}"
  client:
    #是否注册给注册中心
#    register-with-eureka: false
    #是否检索服务
#    fetch-registry: false
    service-url:
      defaultZone: http://raspberrypi31:8761/eureka/, http://raspberrypi32:8761/eureka/
然后是Dockerfile:
# 基于alpine和oracle jre 8
FROM dpsmyth/raspberrypi3-alpine-java

# 将本地文件夹挂载到当前容器
VOLUME ["/tmp"]

RUN echo "#aliyun" > /etc/apk/repositories && \
    echo "https://mirrors.aliyun.com/alpine/v3.6/main/" >> /etc/apk/repositories && \
    echo "https://mirrors.aliyun.com/alpine/v3.6/community/" >> /etc/apk/repositories && \
    apk update && \
    # 修改时区
    apk add tzdata && \
    ln -sf /usr/share/zoneinfo/Asia/Shanghai /etc/localtime && \
    echo "Asia/Shanghai" > /etc/timezone

# add jar
ADD eureka-30-0.0.1-SNAPSHOT.jar app.jar

RUN bash -c 'touch /app.jar'

# 声明暴露的接口
EXPOSE 8761

# 配置容器启动后执行的命令
ENTRYPOINT ["java", "-Djava.security.egd=file:/dev/./urandom", "-Dspring.profiles.active=prod", "-jar", "/app.jar"]
这里选择了alpine和oracle jre8的组合,因为alpine足够小,能满足基本需求,而openjdk8在arm平台上运行非常慢,一个spring boot应用启动要好几分钟,所以这里选择了优化更好的oracle jre。
然后就是docker-compose.yml
version: '3'
services:
  # service name
  eureka30:
    # Dockerfile path
    build: .
    # image
    # image: racecoder/eureka:0.0.2
    # mapping ports
    ports:
      - "8761:8761"
    extra_hosts:
      - "raspberrypi30:192.168.1.30"
      - "raspberrypi31:192.168.1.31"
      - "raspberrypi32:192.168.1.32"
    dns:
      - 192.168.1.1
      - 114.114.114.114
      - 8.8.8.8
      - 1.1.1.1
    volumes:
      - /var/log/webapp:/var/log/webapp
      - /opt/config/docker:/opt/config/docker
    environment:
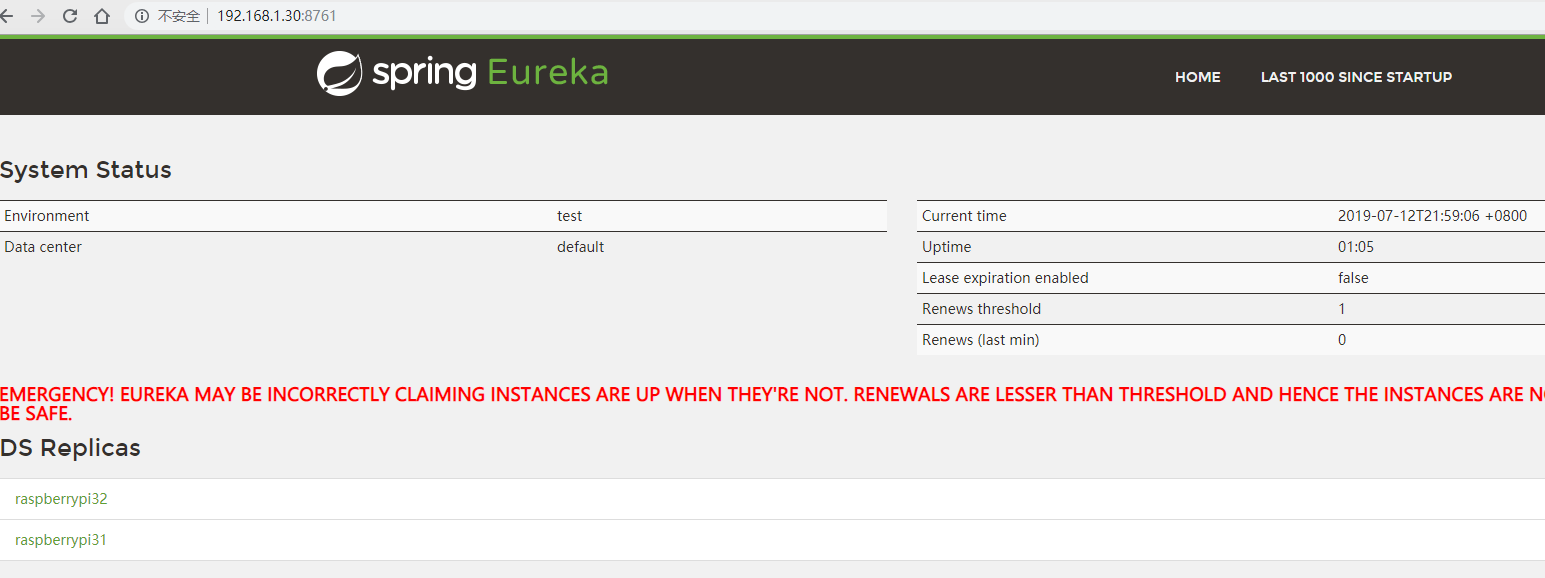
- HOST=192.168.1.30然后运行docker-compose up。当当当当~
这里只启动了一台,另外两台先等等弄,这篇文章写的太累了。K8S什么的也以后说吧,歇会先~
建议有时间的还是自己动手尝试下错误,在错误中成长是最快的。比如我这次如果没试过就不知道alpine和busybox这种能直接当系统用,alpine的默认shell是/bin/sh,不是常见的/bin/bash,才发现bash也有两种,alpine使用MUSL作为标准C library,而Oracle Java基于GNU Standard C library (gclib),所以在alpine上用Java还要安装GNU C library。甚至不知道原来oraclejdk是基于openjdk的,做了一些优化和集成而已。还有apt比apt-get用起来舒服多了。还有很多其他的东西,动手了才会懂,买树莓派不就是为了折腾吗?
 这破站
这破站